Sunday, November 30, 2014

Paper Pumpkin Challenge

So it has been awhile since I've posted anything, keeping up a blog isn't easy. I guess I'm not as disciplined as i thought I was LOL
So I take card classes from a Stampin' Up demonstrator, twice a month, it's a great way for me to relax, not worry about anything and get my creativity flowing.
So last class we each picked a box from the pile of  Stampin' Up Paper Pumpkin kits.
The challenge was for us to make something using only the materials from inside the box, couldn't use any paper, ink or stamps from our collection.
So I got the Paper Pumpkin kit for September 2014, 
which had supplies to make treat bags for my favorite holiday Halloween.


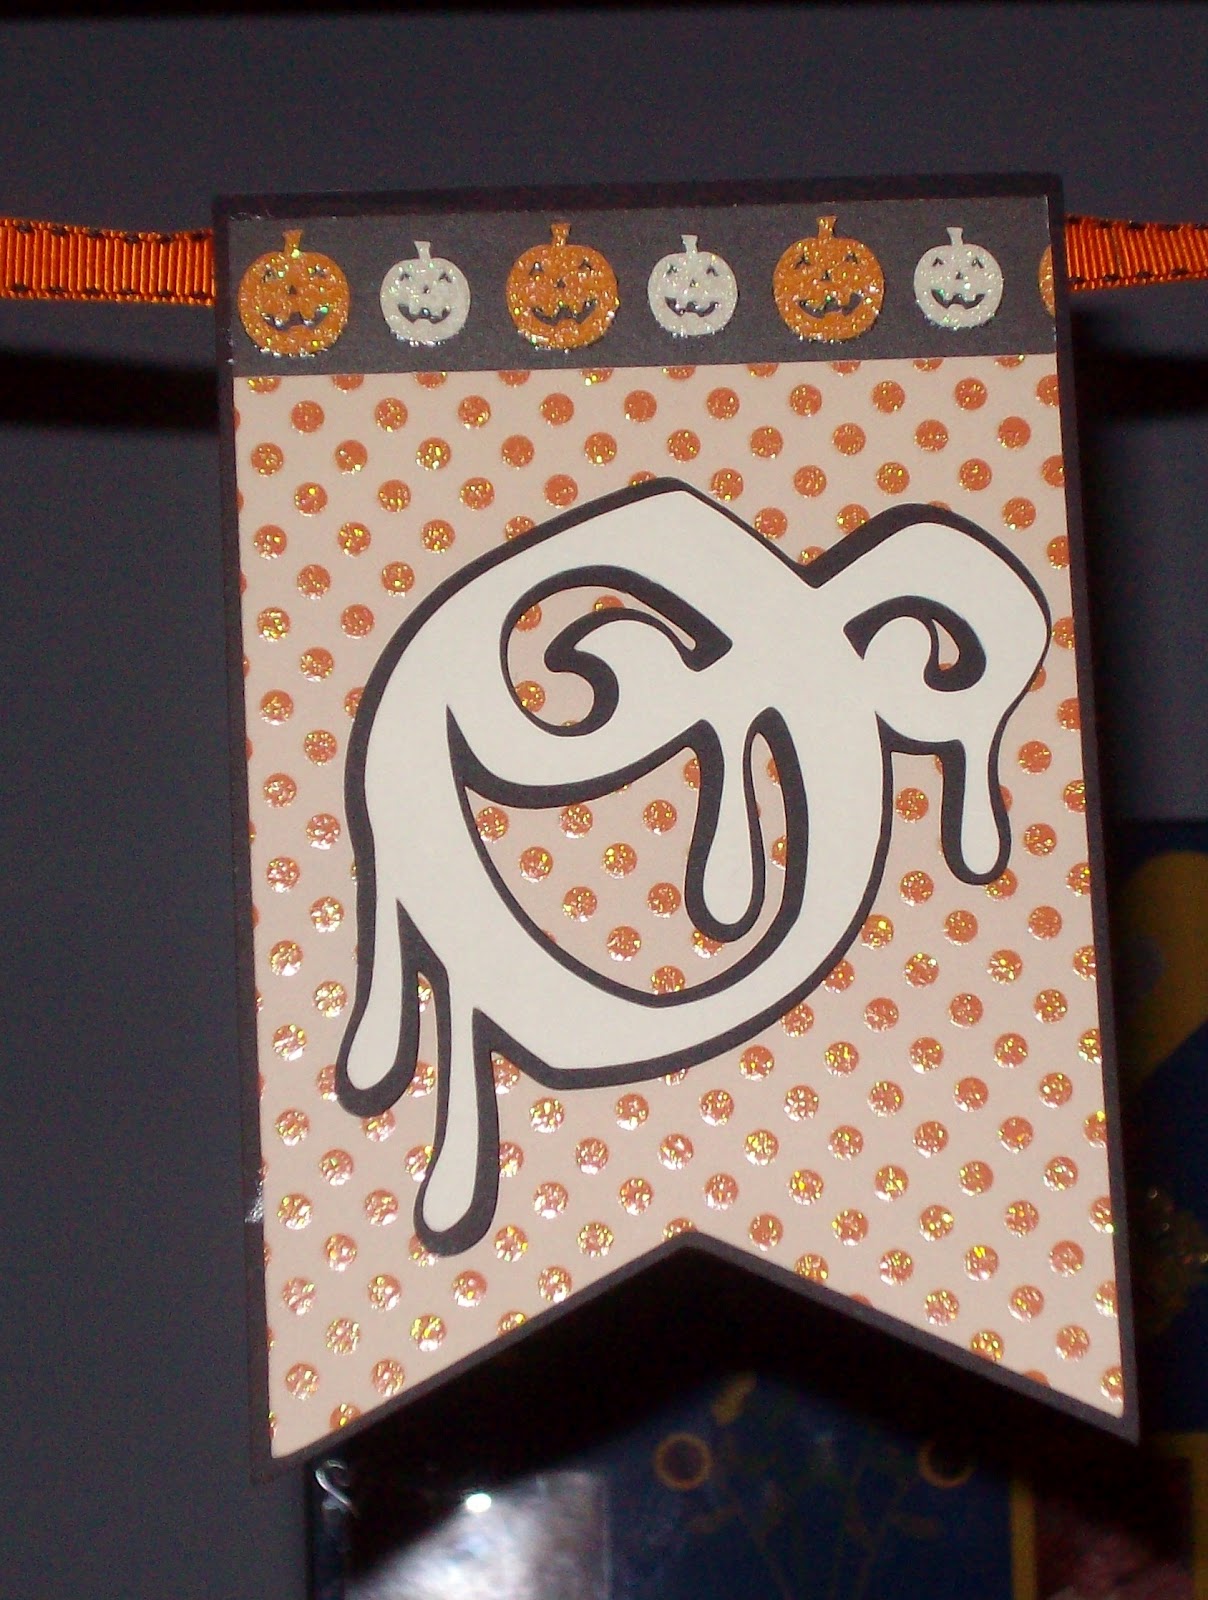
So here is my spin on what I got in the box.


I decided to do a little BOO banner, quite impressed with how it turned out too.
 I attached the sequins and the card stock with glue dots. 


I used the Artisan Label Punch
from Stampin' Up for the layer the letters are on
and popped them up with some dimensional squares.


Tuesday, June 10, 2014

Breakfast it's what was for Dinner!!

     So the other night I forgot to take out meat for dinner. Sometimes I have these squirrel moments where my brain just falls out and I forget that I was on my way to our freezer to take out the protein for our dinner that night. So any-who....when in doubt you can't go wrong with breakfast. Me and "the hubby" get up at different hours so, making breakfast for him before he goes to work isn't likely to happen when he sometimes wakes up at 4am and leaves at 4:30am......so why not for dinner???

-Sinful Sara

P.S. I used my large electric skillet for this one, love that thing, especially when cooking an all-in-one-pan-dish. A large frying pan or saute would work too though.


Sam's Breakfast Skillet

 Ingredients

1 package of frozen Hash Browns (I "un-stuck" mine while they were still in the bag)*
1 can of SPAM (yeah I said SPAM!!)
6 eggs
shredded cheese (which ever kind strikes your fancy)
Canola Oil

1. Heat your pan, HOT!, HOT!, HOT! ( I put my skillet on 400 degrees) and a good spoonful of canola oil.


2. Toss your hash browns into the hot pan and let cook, without stirring for about 3-5 minutes. Meanwhile chop up your SPAM into small chunks.

3. Once hash browns are browned a little toss in chopped SPAM, cook for another 3-5 minutes or however you like your SPAM.

 4.Beat six eggs together and pour evenly over hash browns & SPAM. Cook about 3-5 minutes or however you like you eggs.

5. Shred some cheese and sprinkle some on top. And BOOM! you're all done.


*un-stuck - In this case I slammed the bag of hash browns against the counter until I felt they were no longer in one large chunk, just in case someone out there had no clue what I was talking about, you may laugh but I bet there are more than a few who now are like "Oh!!" and pry a couple who are still going "Huh?!?"

Monday, June 2, 2014


New Direction.....New Start

     When I first began my blog I wanted to try and showcase as many of my crafts as possible. Well if you look at my previous posts I wasn't very consistent. So I decided, when I was ready, to try to post at least twice a week, one day a craft and another day a recipe. So I've finally decided I'm ready and for my first post for my second blog attempt I'm going to start with a recipe....Hope you enjoy!

~Sinful Sara

P.S. Please be advised that I'm not a "trained chef" just a cook. Sometimes I don't always "measure" ingredients per say but I will try to give you as detailed an account of each creation as I can.

Wheat Pasta w/shrimp

 in a tomato cream sauce

 
Ingredients
1 1/2 lbs. Raw Shrimp (devein em and shell em or if your a lil lazy buy pre-cooked)
3/4 c. clam juice 
1/4 lbs. bacon
3/4 c. heavy cream
a bunch of basil (how much you use depends on your taste buds)
5-6 cloves of garlic chopped (add more or less as you prefer)
2 8oz. cans of tomato sauce
Cajun seasoning (I like WEBER N'Orleans Cajun but use whatever you prefer)
1 box whole wheat linguini (or whichever pasta you prefer, with this sauce I think a penne would work as well)
Kosher Salt (I just prefer it but use what you like)
Black Pepper


Directions

1. Fill up your pasta pot with....really?? I hope you know water! Oh yeah and a little salt to season, some people add after it starts to boil but eh in my personal cooking opinion it doesn't matter.Anywho put the bad boy on the stove and start it to boil.

2. Once your pot of water is on the stove get out your saute pan, I recommend a 5 qt. at least, and put it on the stove on medium high heat. While pan is heating cut your bacon first length wise in half then width wise into small little chunks. Cook bacon until crispy and then drain on a plate with paper towels or however you drain your bacon. Turn down the heat to medium

3. Your water should be ready by now so pop your pasta in and drop your colander into the sink. 

4. Return saute pan to the stove, should be on medium heat now if you've been following along. Toss in your chopped garlic and stir until you start to smell it, I'd say about 20 seconds and yes I would count. Then add, in no particular order although I prefer this order, clam juice, tomato sauce and then cream.


5. Once this is simmering and well combined I add my basil but, since i like to get fancy I save some to garnish the finished dish. My pasta is usually done around this time too so I drain it

6. I take some of the Cajun Seasoning and and sprinkle it on the shrimp before I put 'em in. now I DID NOT MEASURE how much I used you will need to decide how spicy you want yours or if you want to use the cajun seasoning at all, just to let you know you don't have to if you don't want to. 


7. Drop the cajun seasoned, or unseasoned, shrimp into the sauce and cook until their pink about 5 minutes does the trick, oh and add the basil too.

8. After the sauce and shrimp are done I remove the saute pan from the stove and add the cooked pasta to the pan and toss 'em together. You toss this in a big serving dish if you wanted to get fancy schmancy but since it was just dinner for a regular 'ol night I just did it in the pan.

9. I garnish with some of the chopped basil and fresh grated Parmesan, I won't buy that powdery stuff in the plastic container I don't care how much the hubby says it doesn't matter or that it tastes ok, that's just no bueno.


Hope you enjoy this recipe because I know my hubby sure loved eating it!!
Oh yeah and I serve mine with french bread because I prefer the soft bread not crunchy,
Italians everywhere will now hate me but the one I married doesn't mind so pbbbbt!


Saturday, March 9, 2013

Live Laugh Love - Scrapbook Page

I'm doing a Scrapbook for a friend of mine.
Thought I'd start sharing one of the pages I'm doing for them
and the sketch I used for inspiration.


Inspiration Page


I found the page on pintrest.
Below is the web address I was able to track it to.


My Interpretation


Supplies

Base Paper - Recollections,Black Equilibrium
Yellow Mat - DCWV The Glitter Cardstock Matstack
Cricut Cartridge - Plantin SchoolBook
Sakura Glaze Pens


I thought it would be a neat affect if I used white letters,
so that I could continue the lines on the back ground paper.
The lines of the paper weren't perfectly straight either,
they were a tad squiggly so matching them up was a cinch.


I decided to continue the affect with the white mat for my picture.
I think it just adds a little something to it,
as I didn't want an overly fancy layout,
just something bright and simple.

Sunday, March 3, 2013

Scrapbook Pages - Wallet Pictures

Thought I'd post some pictures of the two pages I made this weekend.
I've had these older pictures of my niece and nephew for while now,
been meaning to do a page for some of them and finally got around to it.


I used the following for this page
DCWV - White Ginger Stack
Cricut cartridges - Elegant Edges & Plantin SchoolBook

Yellow and White Scallop - Elegant Edges at 9 1/2"
Inner Blue Square- Plantin SchoolBook at 7 3/4"
Rectangles -PlantinSchoolBook at 3 1/2"


For this page I used the following
DCWV - Cherry Limeade
Cricut Cartridge Plantin SchoolBook

Rectangle Mats for pictures - Plantin schoolBook at 4"
Stars - Plantin SchoolBook at 3 1/2"
Letters - Plantin SchoolBook at 1 3/4"


Friday, October 12, 2012

Halloween Silhouette

Decided I wanted to make some personalized silhouette's for some Halloween decorations.
Here is my hubby's. I've also started one of me and our lil dog.


First I took a side profile picture of my hubby, as close as I could with the least amount of background.
I printed out the picture on my computer on 4x6 photo paper in black and white.


I then outlined the profile using a sharpie.
Then I filled in the entire outline and then cut it out.


I used a foam brush and Elmer's glue to completely cover the cut out silhouette.
Then covered it in Martha Stewart glitter in Onyx and set it aside to dry.

After it completely dried I placed a scrapbook stack ontop of it with a few things to weigh
it down because, the photo paper will curl after you glue on the glitter.


I used the Martha Stewart Halloween paper stack that I purchase at Michaels.


Sunday, September 23, 2012

Halloween Banner


Halloween Banner I made for my dining area.
I used Cricut Cartridges; Pretty Pennants & Plantin SchoolBook
Paper is DCWV Bewitched.


I cut the black pennants at 4 3/4", the top layer at 4 1/2".
I cut out the shadow of the letter out at 2 1/2" and the top layer out at 2 1/2".
Letters were adhered with foam squares.
Ribbon I strung them together with I cut at 5" each and adhered about
1" of it onto each connecting pennant.
For the border at the top I just cut a strip 3/8" wide
by about 3 1/4" long.

Sunday, September 16, 2012

Boo Banner


Banner I made for the doorway into our hallway.


I cut the black pennant out at 5", from Cricut Party Pennants, and
the orange, DCWV - Bewitched, I cut at 5 3/4".
For the font I used, Happy Hauntings - Vampire Font, I used
the shadow font and regular and cut them out at 3".
The border at the top of the pennant was from
Recollections Midnight Magic 2011.


I used Cricut - Ribbons & Rosettes - Grass and cut
six out at 2 1/2", paper is from Midnight Magic.
The center is the grass medallion cut out
at 1 1/2" pumpkin is from Ghosts & Goblins.

I used 3/8" ribbon to string it up. I cut each
piece at 6" and attached them to the back
of each pennant.


Sunday, August 26, 2012

Some Cards

Here are a few cards that I have recently made and
a few that I have made in the past.


Wednesday, April 4, 2012

Utensil Holder

I decided to start saving soup and vegetable cans for crafting, hoping
that I could come up with something to do with them. Well
I happen to be off work for Spring Break this week, was staring at
the empty cans and it finally came to me...A Utensil Holder.

My cousin and best friend just got an apartment together
and I thought making them one to go with their purple
themed kitchen would be perfect.

Supplies Needed
Large Soup Can
Modge Podge
Foam Brush
Scrapbook Paper
1/4" Black Grossgrain Ribbon


I ran the cans through the dishwasher, after removing the labels, to make sure they
were extra clean. I took them out right after the heat dry cycle, it made
removing the excess glue dots much easier when they were hot.


I cut out a piece of scrapbook paper to fit just under both
the top and bottom lips of the can. I applied a small layer of
modge podge to both the back of the scrapbook paper and
the can. I used my fingers to press and roll the paper onto
the can, making sure to press out any bubbles.


I let it dry for about 15 minutes and then sealed the top of the paper
with three coats of modge podge. Once they had dried I applied
the modge podge to the ribbon in the same way I did the scrapbook paper.
Once dry I applied another two layers to the entire can, including the
bottom of the can, to prevent any rust rings on the counter.

Tuesday, March 6, 2012

Mini-Cupcake Tower


Decided to make a cupcake tower to display my mini-cupcakes
for a candle party I had.
After I located my xacto knife this project was pretty simple.

Materials & Tools

1. Foam board
2. Scrapbook paper
3. Styrofoam
4. Hot Glue Gun
4. Xacto Knife
5. Cricut Cartridge - Plantin Schoolbook
6. ATG Gun
 
The sizes of the levels are 12", 10" and 8".
I cut the scrapbook paper out first using my cricut, then
I laid them on the foam board to outline where I needed to cut.

To make the colums, I cut the styrofoam out to my desired
height and then hot glued the paper around.
Then I attempted to measure out the center and hot glue
the columns down.

Since I only used this for mini-cupcakes I only did one layer for
each level. But, if you're going to make one for something heavier,
I would recommend doubling the layer of foam board.
To cover the foam edges I would just hot glue some ribbon on.


Friday, February 17, 2012

Stack-a-holic Template Challenge


So this month I decided to participate in the Stack-a-holic Challenge

I used the Ghost & Goblins Stack for my page and
the Happy Hauntings Cricut Cartridge.


I was working rather late at night finishing it and it was only when I had finished
pasting everything down that I noticed it was crooked.
Oh well whatcha gonna do?!?!
I'm so sleepy that at this point I don't even mind, of course
tomorrow is another story LOL.


Monday, February 13, 2012

The Craft Cave


Here is what my new craft cave looked like before the rennovation,
use to be the closet in our spare room.
I wish I would of been able to get a picture of the lovely gold metal framed mirror doors it had.
But my hubby took them out before I could snap a picture LOL.


Some shelving removed and nice new paint job,
I love that aqua breeze with the brown.


New shelving installed and the handmade work space my hubby made me.
He's so awesome to me I love him to pieces.


All done! 


Thursday, February 2, 2012

Classroom Sign


A few months ago I started my new job as a substitute I.A.S.H.
(Instructional Aide Severely Handicapped)
After my first assignement a semi-long term assignment came up, so
I took it. When the posting for the actual position I was subbing for came up,
I decided to give it shot and apply for it permanently.
Well I'm sure you can tell by the sign I've made that I got the job =-).

What I Used

1. DCWV - Songbird Stack
2. Cricut Cartridge - Opposites Attract

Letters were cut at 1 1/14", I'm still trying to master the shadow of the
letters but eh I like it even if it isn't perfect.
I cut the birds at the botton out freehand as I did with the "Welcome"
tag and the border along the side and the mat.

Saturday, January 14, 2012

Mini Reminder Board with Push Pins


So I've had this square piece of cork board for a few years now. It was part of the craft supplies
I inherited from my mother-in-law, may she rest in peace, a couple of years ago.
After hopping along on the My Pink Stamper Blog Hop tonight I had an inspiration to finally use it.


Here are the supplies I used


12" x 12" Cork Board Square


Four pieces of cardstock strips.
I cut mine 1"wide by 12" long.


Mod Podge & a foam brush.


Two Command Medium Picture Hanging Strips


Flat back resins or buttons with loops removed,
thumb tacks and glue gun.

What I did
  1. Cut cardstock strips in 1" x 12" strips
  2. Applied modge podge to the smooth side of the cork board 1" layer at top edge.
  3. Applied another layer directly to cardstock strips.
  4. Pressed cardstock firmly to the cork square.
  5. Repeated process around entire border of cork square.
  6. After strips have dried apply Command Strips to top left & right hand corner.
  7. To make push pins I applied hot glue onto the push pin and then pressed the resinbutton firmly, holding it into place until it had fully dried.
  8. I then used the Believe stamp from the My Pink Stamper Christmas Wishes set and stamped two pieces of white cardstock and adhered them to the top left & right corners.


For some reason I can't seem to link the blog hop on here so I'll just post a link
directly to My Pink Stmapers blog.

http://www.mypinkstamper.com/