Sunday, September 16, 2012

Boo Banner


Banner I made for the doorway into our hallway.
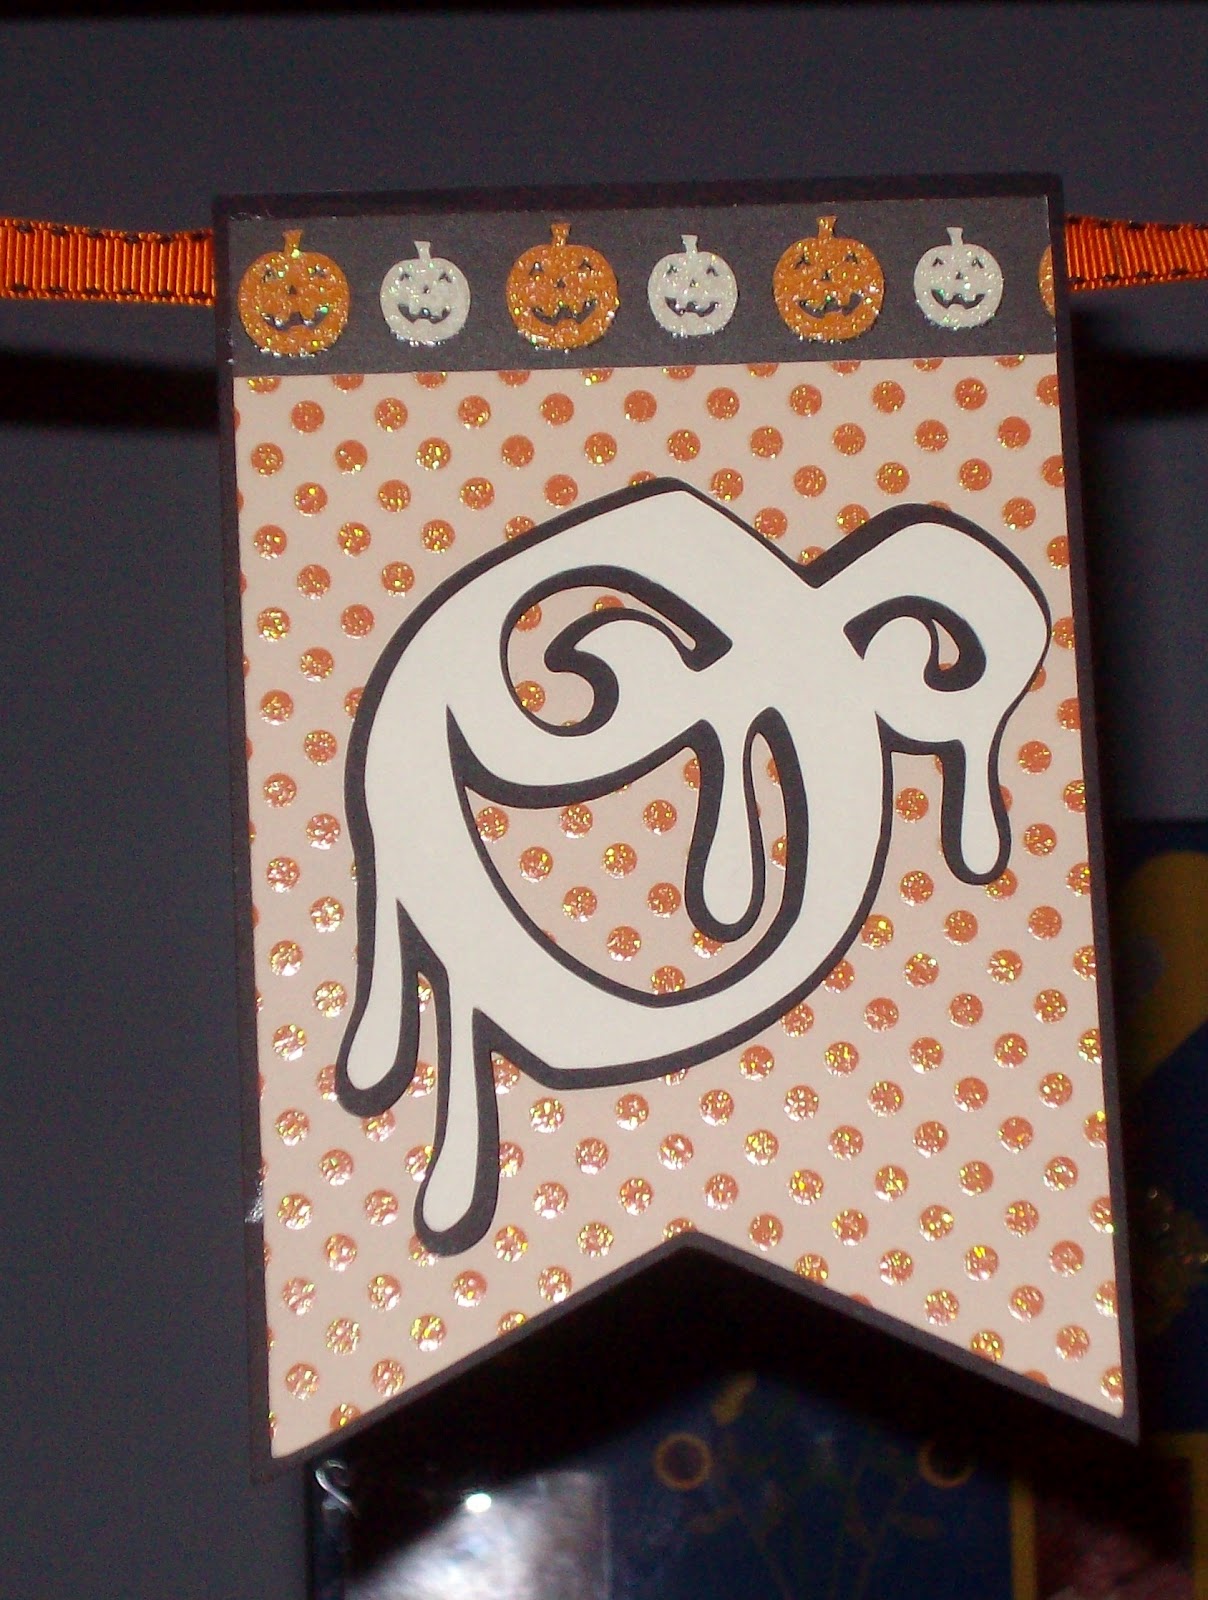

I cut the black pennant out at 5", from Cricut Party Pennants, and
the orange, DCWV - Bewitched, I cut at 5 3/4".
For the font I used, Happy Hauntings - Vampire Font, I used
the shadow font and regular and cut them out at 3".
The border at the top of the pennant was from
Recollections Midnight Magic 2011.


I used Cricut - Ribbons & Rosettes - Grass and cut
six out at 2 1/2", paper is from Midnight Magic.
The center is the grass medallion cut out
at 1 1/2" pumpkin is from Ghosts & Goblins.

I used 3/8" ribbon to string it up. I cut each
piece at 6" and attached them to the back
of each pennant.


Sunday, August 26, 2012

Some Cards

Here are a few cards that I have recently made and
a few that I have made in the past.


Wednesday, April 4, 2012

Utensil Holder

I decided to start saving soup and vegetable cans for crafting, hoping
that I could come up with something to do with them. Well
I happen to be off work for Spring Break this week, was staring at
the empty cans and it finally came to me...A Utensil Holder.

My cousin and best friend just got an apartment together
and I thought making them one to go with their purple
themed kitchen would be perfect.

Supplies Needed
Large Soup Can
Modge Podge
Foam Brush
Scrapbook Paper
1/4" Black Grossgrain Ribbon


I ran the cans through the dishwasher, after removing the labels, to make sure they
were extra clean. I took them out right after the heat dry cycle, it made
removing the excess glue dots much easier when they were hot.


I cut out a piece of scrapbook paper to fit just under both
the top and bottom lips of the can. I applied a small layer of
modge podge to both the back of the scrapbook paper and
the can. I used my fingers to press and roll the paper onto
the can, making sure to press out any bubbles.


I let it dry for about 15 minutes and then sealed the top of the paper
with three coats of modge podge. Once they had dried I applied
the modge podge to the ribbon in the same way I did the scrapbook paper.
Once dry I applied another two layers to the entire can, including the
bottom of the can, to prevent any rust rings on the counter.

Tuesday, March 6, 2012

Mini-Cupcake Tower


Decided to make a cupcake tower to display my mini-cupcakes
for a candle party I had.
After I located my xacto knife this project was pretty simple.

Materials & Tools

1. Foam board
2. Scrapbook paper
3. Styrofoam
4. Hot Glue Gun
4. Xacto Knife
5. Cricut Cartridge - Plantin Schoolbook
6. ATG Gun
 
The sizes of the levels are 12", 10" and 8".
I cut the scrapbook paper out first using my cricut, then
I laid them on the foam board to outline where I needed to cut.

To make the colums, I cut the styrofoam out to my desired
height and then hot glued the paper around.
Then I attempted to measure out the center and hot glue
the columns down.

Since I only used this for mini-cupcakes I only did one layer for
each level. But, if you're going to make one for something heavier,
I would recommend doubling the layer of foam board.
To cover the foam edges I would just hot glue some ribbon on.


Friday, February 17, 2012

Stack-a-holic Template Challenge


So this month I decided to participate in the Stack-a-holic Challenge

I used the Ghost & Goblins Stack for my page and
the Happy Hauntings Cricut Cartridge.


I was working rather late at night finishing it and it was only when I had finished
pasting everything down that I noticed it was crooked.
Oh well whatcha gonna do?!?!
I'm so sleepy that at this point I don't even mind, of course
tomorrow is another story LOL.


Monday, February 13, 2012

The Craft Cave


Here is what my new craft cave looked like before the rennovation,
use to be the closet in our spare room.
I wish I would of been able to get a picture of the lovely gold metal framed mirror doors it had.
But my hubby took them out before I could snap a picture LOL.


Some shelving removed and nice new paint job,
I love that aqua breeze with the brown.


New shelving installed and the handmade work space my hubby made me.
He's so awesome to me I love him to pieces.


All done! 


Thursday, February 2, 2012

Classroom Sign


A few months ago I started my new job as a substitute I.A.S.H.
(Instructional Aide Severely Handicapped)
After my first assignement a semi-long term assignment came up, so
I took it. When the posting for the actual position I was subbing for came up,
I decided to give it shot and apply for it permanently.
Well I'm sure you can tell by the sign I've made that I got the job =-).

What I Used

1. DCWV - Songbird Stack
2. Cricut Cartridge - Opposites Attract

Letters were cut at 1 1/14", I'm still trying to master the shadow of the
letters but eh I like it even if it isn't perfect.
I cut the birds at the botton out freehand as I did with the "Welcome"
tag and the border along the side and the mat.